Visualizing ClickHouse® Data with Apache Superset, Part 1: Installation
Apache Superset is a powerful business intelligence tool that offers creative ways to view and explore data. It is also increasingly popular among ClickHouse users. In Part 1 of this blog series we will show how to install Superset and connect to ClickHouse. In Part 2 we will explore how to create displays with publicly available ClickHouse data.
The article you are reading reflects shared open source community work to improve Superset connectivity to ClickHouse. Altinity recommends the clickhouse-sqlalchemy driver maintained by Konstantin Lebedev, as it is well-maintained and supports TLS encryption on connection. We help maintain the driver and test Superset compatibility regularly. We also work jointly with Superset maintainers at Preset.io to improve support.
Now let’s head straight into the weeds. We’ll cover 3 ways to install Superset and then show how to connect from Superset to your first ClickHouse database. Code examples are based on Ubuntu 18.04, Superset 1.1.0, and clickhouse-sqlalchemy 0.1.6. Data is from the Altinity.Cloud public ClickHouse endpoint.
Installation Method 1: Python virtual environment
The first method installs Superset directly on your host. We’ll start by creating a Python virtual environment. Here are the usual commands, including upgrading pip to the latest and greatest version.
python3 -m venv clickhouse-sqlalchemy
. clickhouse-sqlalchemy/bin/activate
pip install --upgrade pip
Install and start Superset
Follow the instructions to install Superset from the documentation. Here are the commands I use for work on Superset connectivity to ClickHouse. You may need to adjust these slightly for your environment.
export FLASK_APP=superset
pip install apache-superset
superset db upgrade
superset fab create-admin
superset load_examples
superset init
They should complete successfully, at which point you can add the ClickHouse driver.
Install clickhouse-sqlalchemy driver.
There are currently two ClickHouse SQLAlchemy drivers: clickhouse-sqlalchemy and sqlalchemy-clickhouse. As noted at the beginning, the clickhouse-sqlalchemy driver is the more robust and well-maintained. Let’s therefore install the clickhouse-sqlalchemy driver as recommended. This will pull in the clickhouse-driver module, which is the standard Python ClickHouse native TCP driver.
pip install clickhouse-sqlalchemyCheck versions once you are done. To ensure full TLS connection support including Server Name Indications (SNI), the clickhouse-driver version must be 0.2.0 or higher. This supports SNI, which is required when connecting to ClickHouse clusters in services like Altinity.Cloud. The clickhouse-sqlalchemy driver should be 0.1.6 or greater, which has bug fixes to improve Superset compatibility.
pip freeze |grep clickhouse
clickhouse-driver==0.2.0
clickhouse-sqlalchemy==0.1.6
Start Superset and Login
It’s time to start Superset. Run the following command:
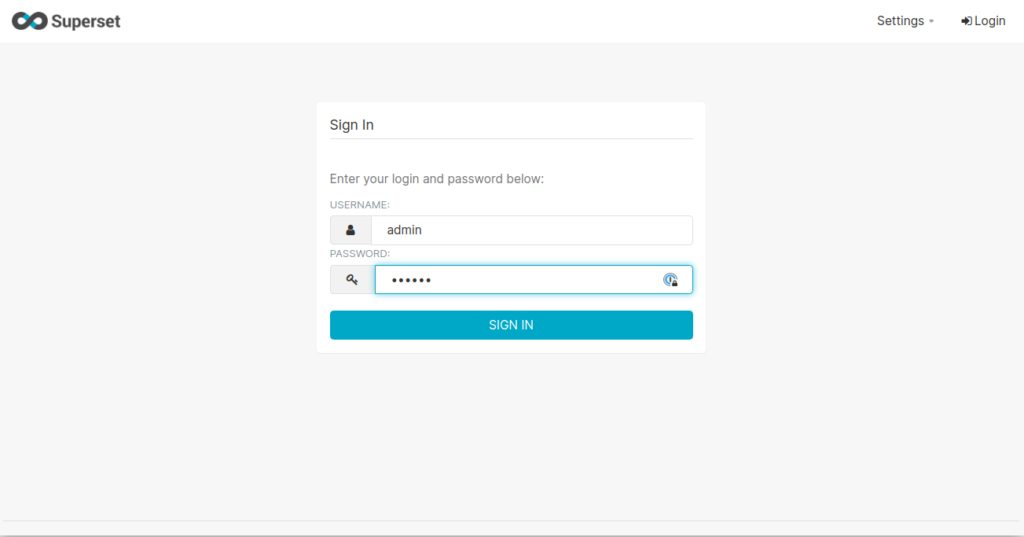
superset run -p 8088 --with-threads --reload --debuggerNow point your favorite browser to the following URL: http://localhost:8088. You’ll see a login screen like the following. Enter the admin login and password you defined during the Superset installation, e.g., admin/secret.
Method 2: Run Superset using Docker Compose
Well, that was fun! But perhaps you don’t want to wrestle with Python versions, virtual environments, and pip. Fortunately there’s another way. Let’s bring up Superset in Docker.
You’ll start by installing docker followed by docker-compose. This varies considerably by platform so we’ll assume you can install using the install documentation links. You should see results like the following once this is done.
$ docker --version
Docker version 19.03.4, build 9013bf583a
$ docker-compose --version
docker-compose version 1.29.1, build c34c88b2
From here we can bring up Superset using docker-compose in short order. See the Superset installation docs for more details. Here are the commands that I use.
git clone https://github.com/apache/superset
cd superset
touch ./docker/requirements-local.txt
echo "clickhouse-driver>=0.2.0" >> ./docker/requirements-local.txt
echo "clickhouse-sqlalchemy>=0.1.6" >> ./docker/requirements-local.txt
docker-compose -f docker-compose-non-dev.yml up
This will print a raft of messages. Note: If you run into errors pulling down docker images, run docker login. I was unable to download the Redis container until I did this.
Once Superset is running in docker, you can login at http://localhost:8088/ as before. The default login/password is admin/admin.
Method 3: Use Preset Cloud
If you don’t want to bother with local Superset installation at all, Preset.io offers a nice alternative: Preset Cloud. This is a managed Superset installation that takes care of all dependencies, including loading the proper clickhouse-sqlalchemy driver version.
The following example shows a ClickHouse workspace that I have been using to test Preset connections to Altinity.Cloud. You just open the workspace and start using Superset.
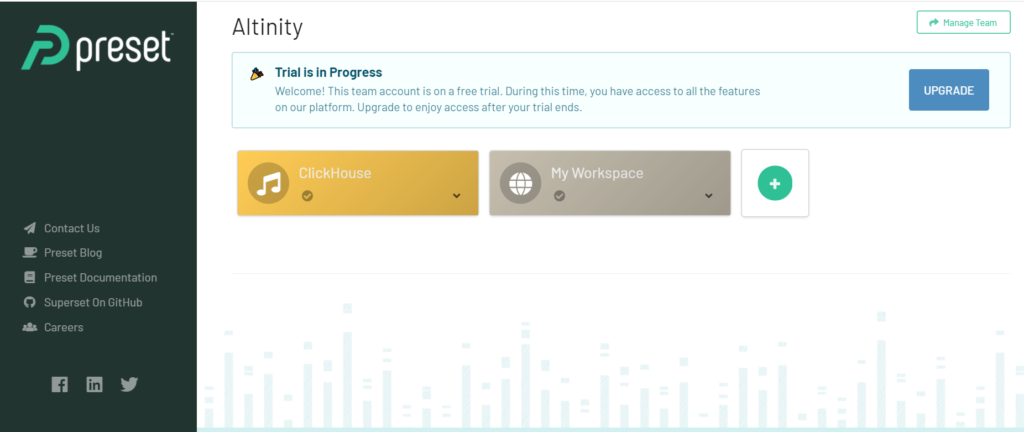
Preset Cloud incidentally works great with Altinity.Cloud. Contact us or request a trial Altinity.Cloud environment to learn more.
Connecting to ClickHouse
Regardless of your chosen installation method, you are now ready to connect to your first ClickHouse database.
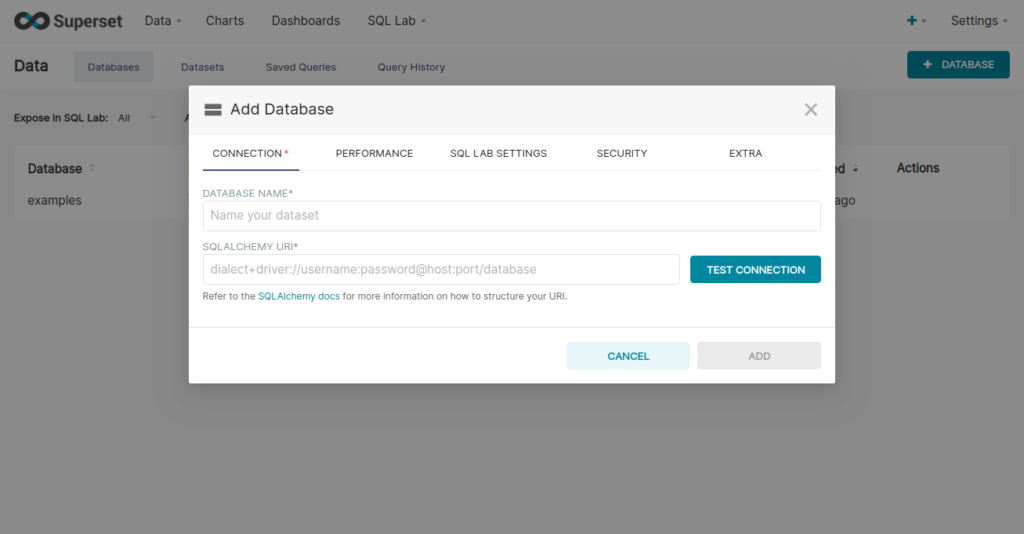
After login you’ll see a screen with your recent work as well as current dashboards. Select the Data tab at the top right and press Databases. A page will appear with your current database connections. Press the “+ Database” button to add a new database.
Note: If you don’t see the “+ Database” button it means your account lacks privileges to configure database connections. This is possible if Superset was installed by someone else. Check with the owner to add privileges to your account.
Enter the following values for the fields.
DATABASE NAME: clickhouse-public
SQLALCHEMY URL: clickhouse+native://demo:demo@github.demo.trial.altinity.cloud/default?secure=true
The URL points to a public ClickHouse endpoint in Altinity.Cloud. It is read-only and contains interesting datasets. Your screen should now appear as follows.

Press the TEST CONNECTION button. You should see the message “Connection looks good!” Press ADD to save the connection. You now have a connection to ClickHouse and can start creating graphs and dashboards.
Superset connectivity and ClickHouse URLs
Some readers like to understand what happens under the covers when Superset connects to ClickHouse. This section is for you. We’ll look at the connectivity and dig into the URL format.
Superset is written in Python. It uses SQLAlchemy, a general purpose API for connecting to ClickHouse, as well as many other databases. Here’s a quick sketch of the architecture.
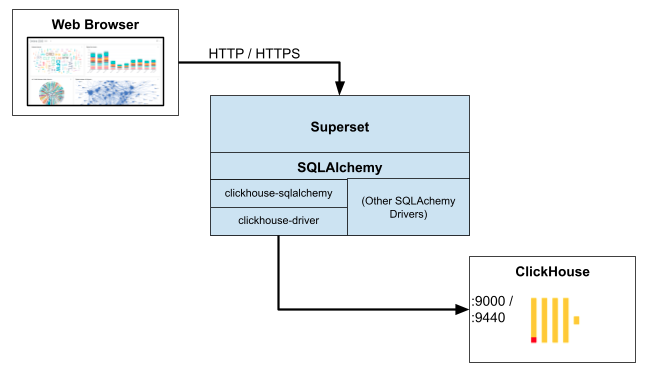
SQLAlchemy connections use a specialized URL format that supports multiple drivers. To connect to ClickHouse, you provide a URL like one we showed previously:
clickhouse+native://demo:demo@github.demo.trial.altinity.cloud/default?secure=trueSQLAlchemy will poll the available drivers to find one that accepts the URL It then uses that driver for requests to the database.
More About ClickHouse URLs
ClickHouse has two main wire protocols for ClickHouse: native TCP and HTTP. The clickhouse-sqlalchemy driver supports both, but we recommend the native protocol as the project maintainer has deprecated HTTP. Native wire protocol URLs look like the following. Options are passed as key-value pairs.
clickhouse+native://<user>:<password>@<host>:<port>/<database>[?options…]The example URL we gave above connects via native TCP protocol with user demo, password demo, using an encrypted connection (secure=true option). It will use port 9440 by default, which must be exposed to make a successful connection.
If you are using ClickHouse server on your laptop, you can get away with a native protocol URL like the following. It uses the default user without a password, and does not encrypt the connection. It will use port 9000, which is default for non-encrypted connections.
clickhouse+native://localhost/defaultThe native protocol driver accepts a rich set of options. See the clickhouse-driver documentation for more information. Here’s an example of a connection that limits the secure connection timeout to 10 seconds and forces use of TLS 1.2 encryption.
clickhouse+native://demo:demo@github.demo.trial.altinity.cloud/default?secure=true&connect_timeout=10&ssl_version=PROTOCOL_TLSv1_2Conclusion and Next Article
In the preceding article we covered 3 ways to install Superset to work with ClickHouse and showed how to create the first database connection. In all cases we recommend use of the clickhouse-sqlalchemy driver, which is well-maintained and secure.
There’s a lot more to come. In the next article, we’ll get to the fun part–visualizing data with Superset from the Altinity.Cloud public endpoint. We’ll explore a number of the creative graphs offered by Superset and also dig into details of building queries in SQL.
P.s., It takes a village to integrate open source projects. On behalf of ClickHouse users worldwide I want to thank Konstantin Lebedev and the Superset community team at Preset.io, especially Maxime Beauchemin, Eugenia Moreno, and Srini Kadamati. Thanks also to my colleagues Eugene Klimov and Mikhail Filimonov at Altinity for help with testing!
ClickHouse® is a registered trademark of ClickHouse, Inc.; Altinity is not affiliated with or associated with ClickHouse, Inc.