My First ClickHouse® Cluster on GCP
As regular readers of this blog are aware, Altinity.Cloud now supports Google Cloud Platform, also known as GCP. I recently took the new capability out for a spin to see what it’s like to run ClickHouse there.
Spoiler: it’s virtually identical to running on AWS, which we’ve supported since 2020. That’s good. Our first priority is to enable customers to run ClickHouse easily, anywhere they want.
OK, let’s dig in!
Getting Started
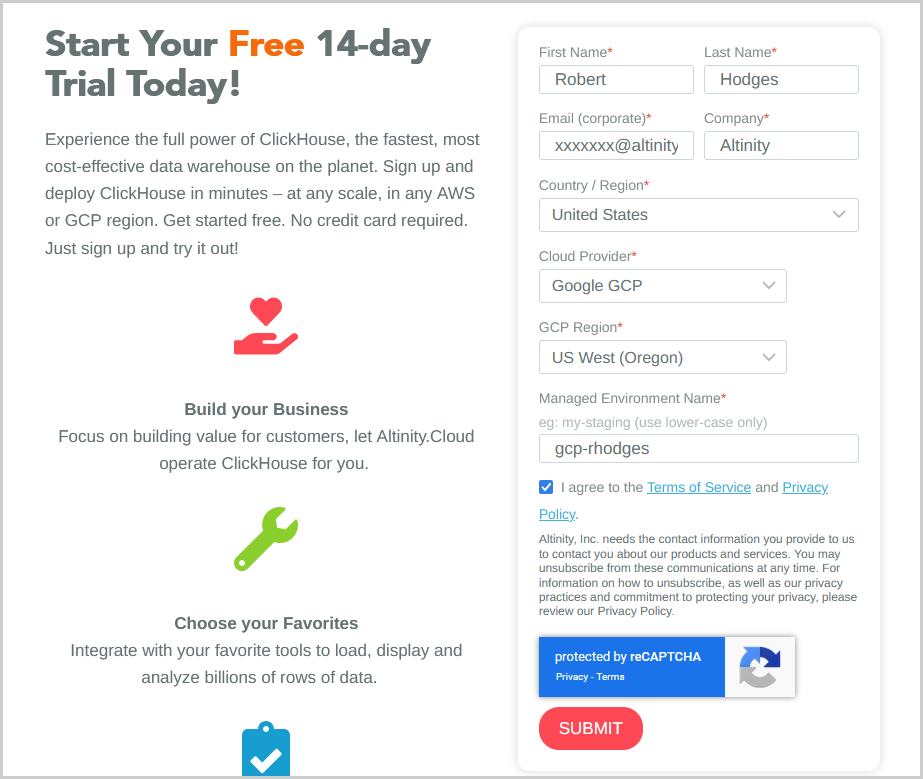
For this experiment, I started with a trial account on Altinity.Cloud, which is free for anyone with a business email. Just fill out the trial request form on the Altinity website. A Google trial request looks like the following picture.
You can select either Google or Amazon. I selected Google GCP, then picked a region. Altinity.Cloud already supports dozens of regions. If you need one that is not on the list, just ask us. We can usually add new regions in a day or so.
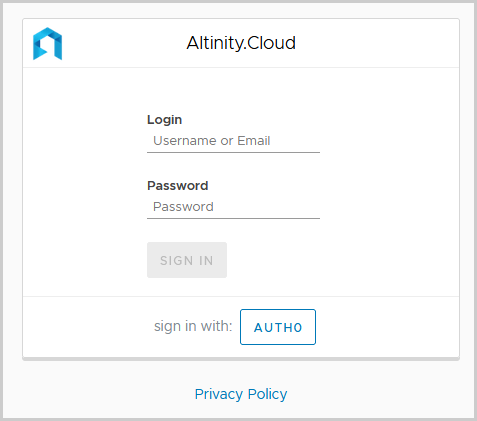
I followed the steps to validate my email and then received a notification after Altinity approved my request and provisioned the environment. At that point, I received an email inviting me to login to my new account at acm.altinity.cloud and provided the link. It throws up the login screen shown below.
I selected AUTH0, which uses Google Authentication to authenticate my account. Assuming I’m using the same email address as I used for the trial request, Altinity.Cloud logs me in. This is the recommended way to authenticate in Altinity.Cloud.
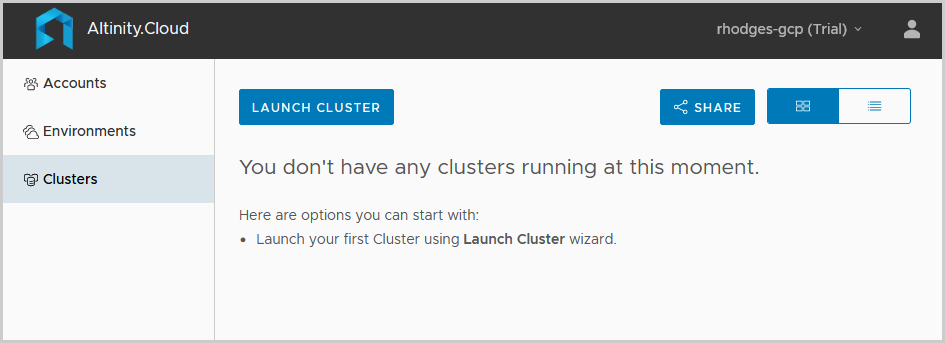
Here’s the Altinity.Cloud initial screen for a new account. I’m in and can start a cluster whenever it’s convenient.
Checking on the Kubernetes environment
Altinity.Cloud allocates a separate Kubernetes cluster for each tenant, which we call an environment. We separate environments to ensure complete isolation from other tenants, which is helpful for security as well as performance reasons. Let’s have a quick look at the environment before we actually start ClickHouse. Press the Environments tab, which brings up a page like the following.

If I press the link on my environment, a dashboard page appears with details about the environment. Here is what I see for Google Cloud.
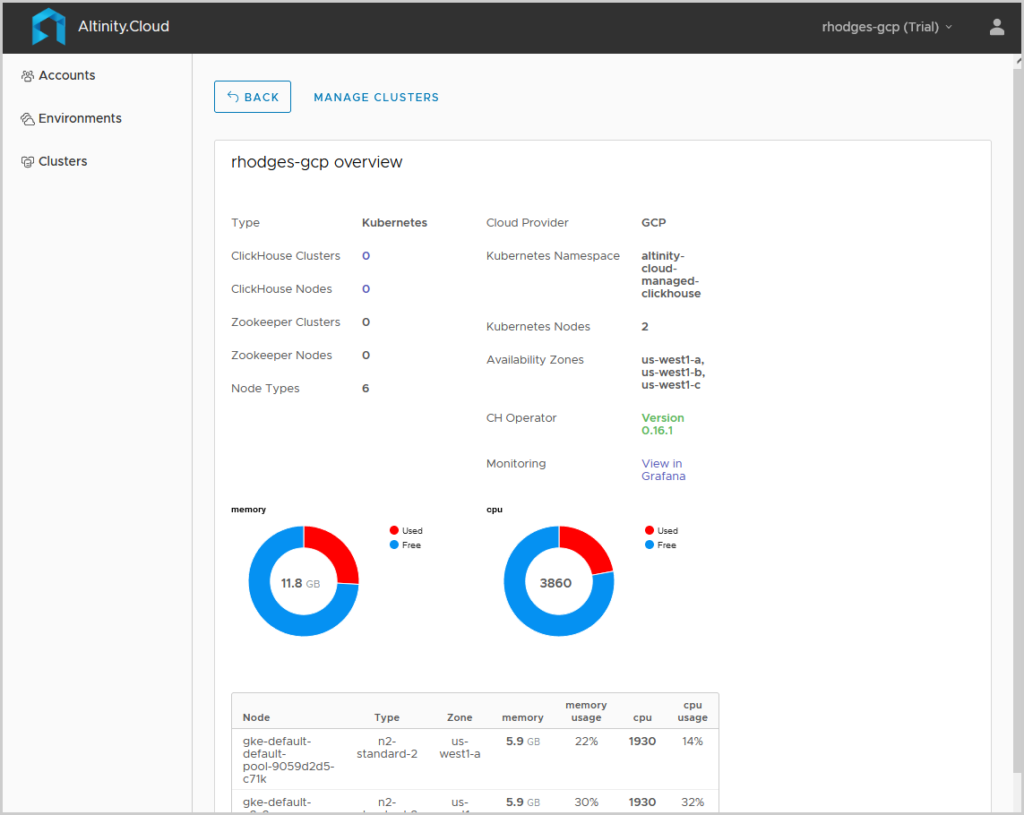
Kubernetes clusters look very similar across different cloud platforms. There are just two hints that I’m running on Google Cloud.
- The cloud provider is labeled GCP.
- The VM name and the VM type n2-standard-2 show that we are running on GKE, which is Google’s managed cloud offering.
With this quick look we are ready to go back and create a ClickHouse cluster. Press the Clusters tab on the left to return to the original screen we saw at login.
Creating a new ClickHouse cluster
My first step is to kick off the cluster creation wizard by pressing the LAUNCH CLUSTER button. This pops up a series of screens starting with basic resource configuration. I fill out the fields as shown below.
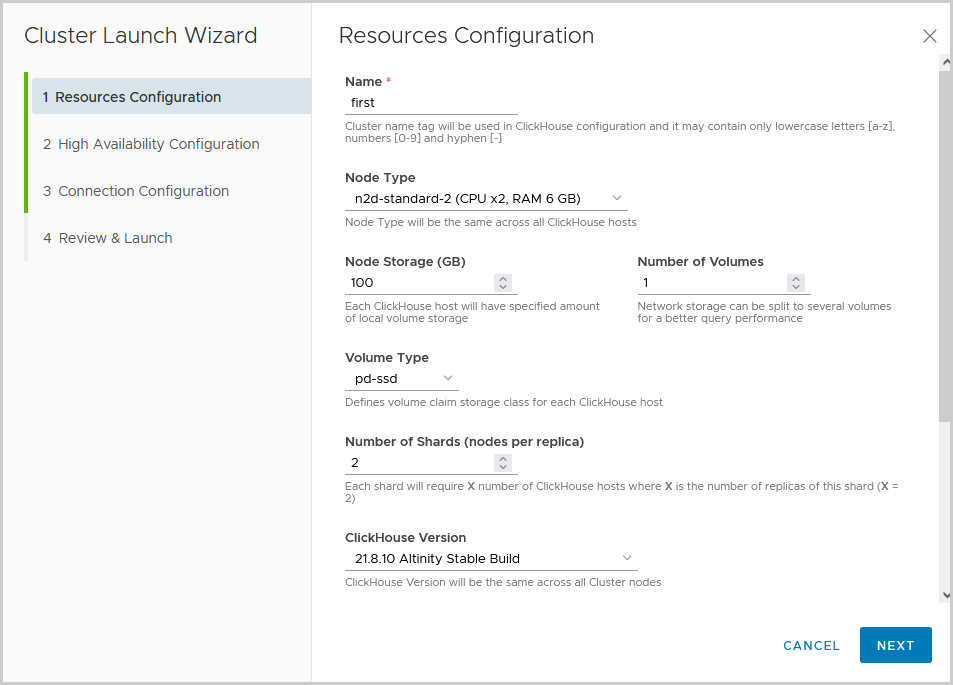
The fields are easy to understand and have extra help to ensure you know what they do. We are on GCP, there are some platform-specific storage type options.
- pd-standard — Basic block storage with low-end performance
- pd-balanced — Cost-efficient, high performance block storage
- pd-ssd — SSD-backed block storage, which has the best performance but highest cost for production deployments.
Since this is just a trial I pick pd-ssd for fun. I also selected the version 21.8.10 Altinity Stable Build, which is the LTS version of ClickHouse built by Altinity. This is the same open source build you can run yourself by downloading an RPM, .deb, or a Docker container. Altinity.Cloud builds are all 100% open source. You can switch between managing ClickHouse yourself and running in Altinity.Cloud without any concerns about lock-in.
Finally, I set a nice long password for the ClickHouse admin user, which is required by Altinity.Cloud. You can login with it yourself or (better) create new users once the cluster is up and running.
Now I press NEXT to set the ClickHouse high availability configuration, which provides settings for replication and backup. The screen looks like the following illustration. There’s not much to do–2 replicas is a good HA configuration already and dedicated Zookeepers (i.e., non-shared) are also standard practice.
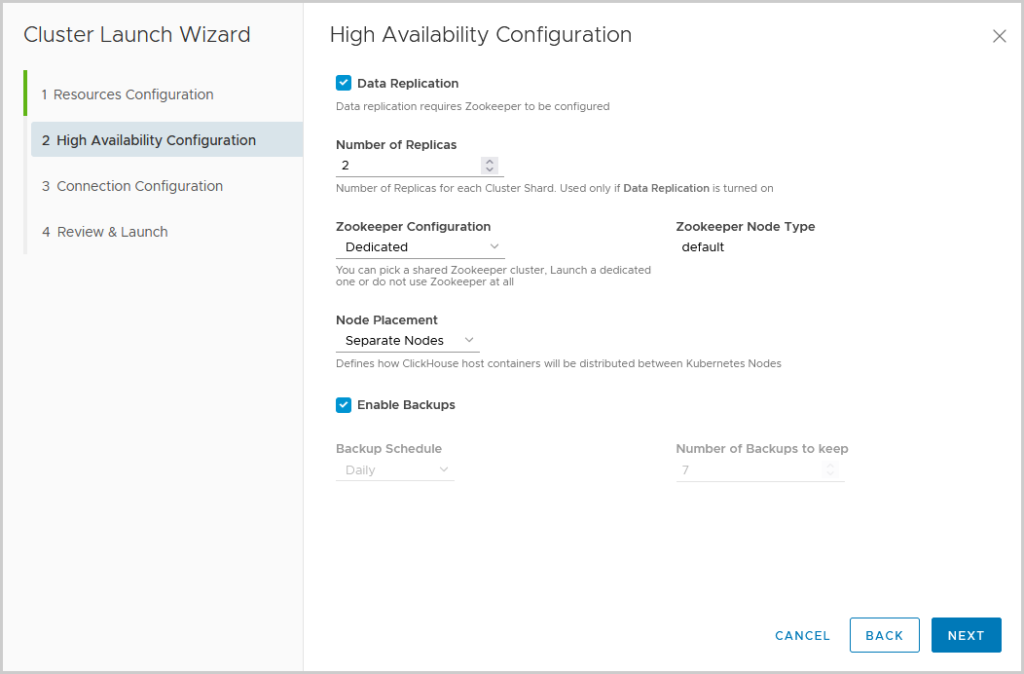
I just accept the settings and press NEXT. The succeeding page contains connection settings to access my future cluster.
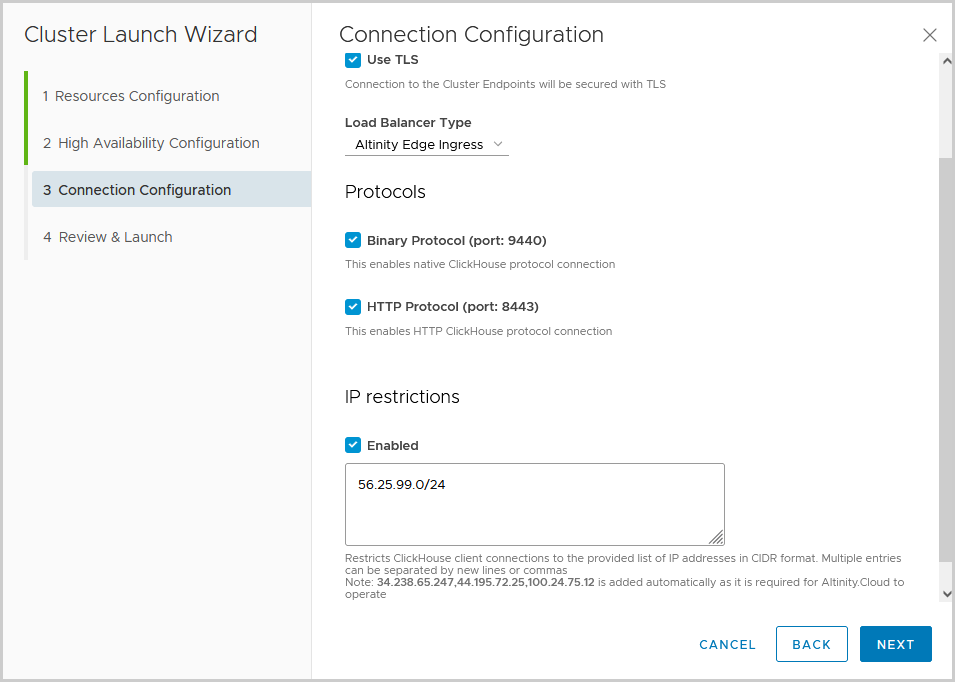
Most settings on this page are also standard. However, I’m going to set an IP restriction to allow only traffic from my local IP address. Here’s what it looks like.
My IP is dynamic so I add the subnet mask to reduce the chance of losing if the IP switches. I can also just use a single address like 51.1.97.22/32. It’s easy to change IP settings once the cluster is up and running, so I don’t need to worry about losing access if the IP changes.
It’s now time to press NEXT and review settings before launching the cluster. Here is the review page.
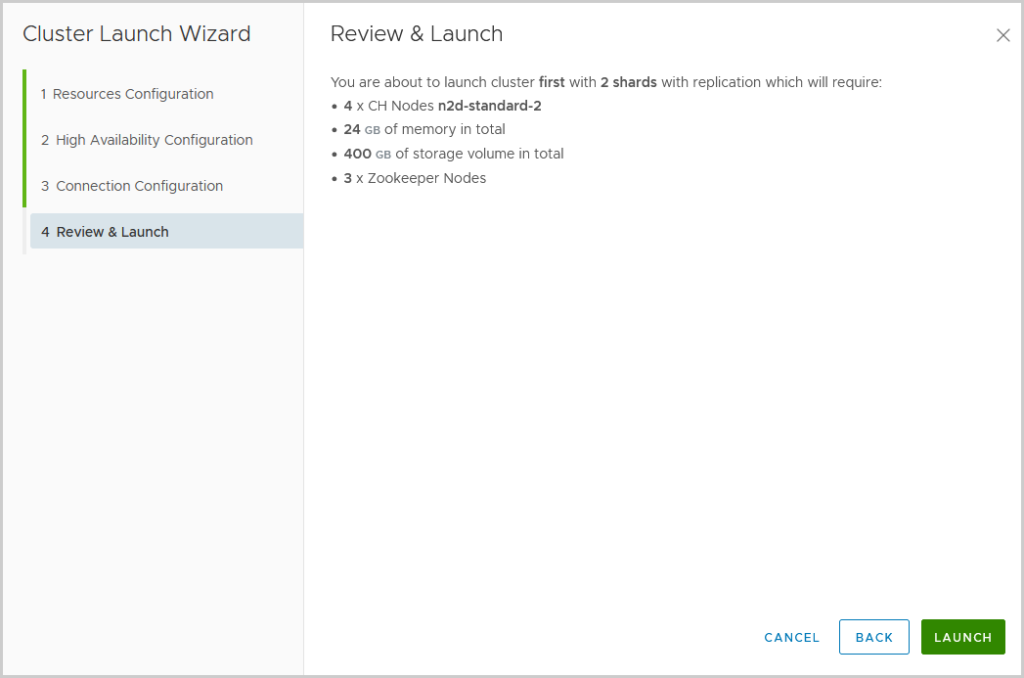
We’re all set, so I just press LAUNCH to start the cluster. This bounces me back to the Clusters pane where I can watch the cluster come up. After a few minutes the cluster is up with all nodes available and health checks passing.
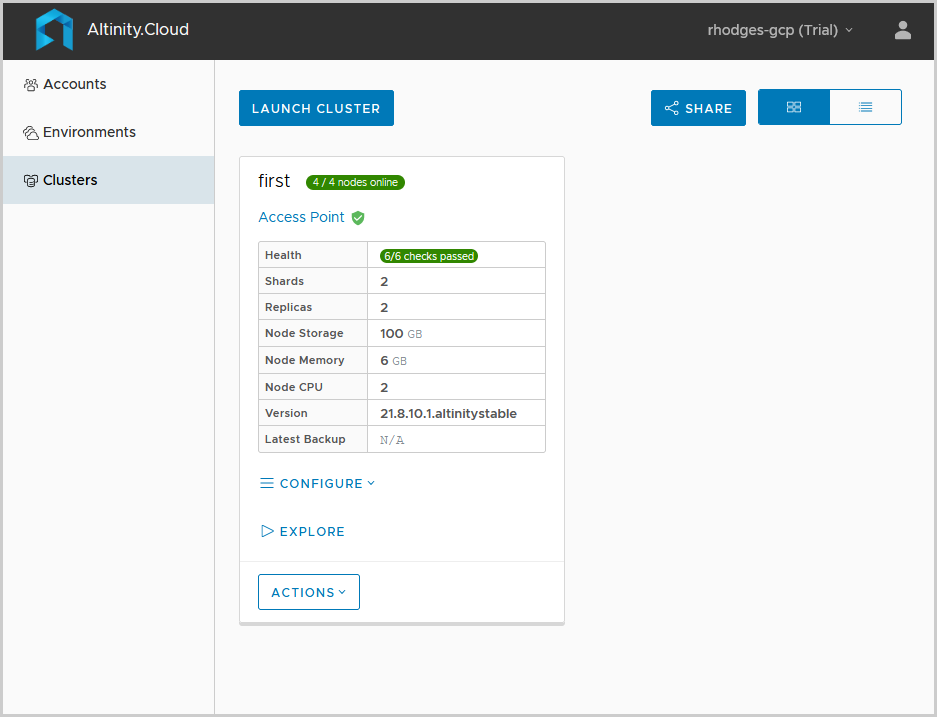
ClickHouse is ready to go. It’s time to connect and try it out!
Connecting to the new ClickHouse cluster
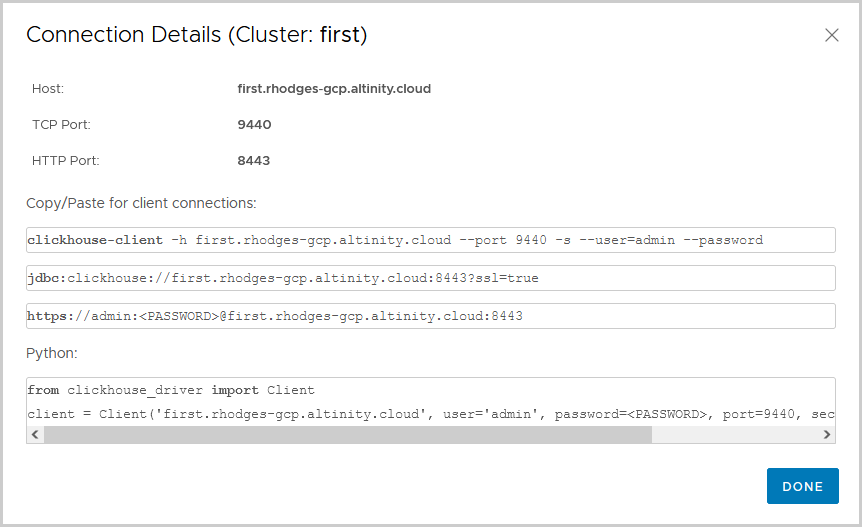
Altinity.Cloud offers a user-friendly page with connection information for new clusters. I just press the Access Point link, and the following screen shows up. It’s one of the most useful features of Altinity.Cloud and even shows Python connection code.
Clickhouse-client is my favorite client whenever Linux is available. I’ll step over to one of my dev servers and login to the new server using the handy command examples shown in the Connection Details pop-up.
$ clickhouse-client -h first-0-0.rhodges-gcp.altinity.cloud --port 9440 -s --user=admin --password
ClickHouse client version 21.11.4.14 (official build).
Password for user (admin):
Connecting to first-0-0.rhodges-gcp.altinity.cloud:9440 as user admin.
Connected to ClickHouse server version 21.8.10 revision 54449.

ClickHouse server version is older than ClickHouse client. It may indicate that the server is out of date and can be upgraded.

first :) select distinct host_name from system.clusters where cluster='first'

SELECT DISTINCT host_name
FROM system.clusters
WHERE cluster = 'first'

Query id: 5f1addd7-0671-46e8-b0df-7af542f43c0a

┌─host_name───────────┐
│ chi-first-first-0-0 │
│ chi-first-first-0-1 │
│ chi-first-first-1-0 │
│ chi-first-first-1-1 │
└─────────────────────┘

4 rows in set. Elapsed: 0.053 sec.
That’s it! My new cluster is ready to go. I can start loading data.
Conclusion
This has been a quick tour of starting my first ClickHouse cluster on GCP using Altinity.Cloud. You can find full documentation about Altinity.Cloud on the Altinity Documentation website. If you have further questions, just ask. Altinity.Cloud accounts include a free Slack channel to communicate easily with our support team.
Altinity.Cloud makes it easy to bring up ClickHouse clusters in the Amazon and Google Cloud. Other than VM types and network addresses there are no practical differences between them. That’s the point, of course. We’re all about portability and letting customers make the choice of location to run. Since Altinity.Cloud uses 100% open source builds you can switch easily between our cloud and your own environments, wherever those may be. There’s never any lock-in.
So go ahead and use ClickHouse wherever it’s convenient. Whatever choice you make, Altinity is here to help!
ClickHouse® is a registered trademark of ClickHouse, Inc.; Altinity is not affiliated with or associated with ClickHouse, Inc.