Low-Cost ClickHouse® clusters using Hetzner Cloud with Altinity.Cloud Anywhere
If you love ClickHouse®, Altinity can simplify your experience with our fully managed service in your cloud (BYOC) or our cloud and 24/7 expert support. Learn more.
For many developers, running ClickHouse economically is very important, and Altinity provides the tools to do so. This article will guide you on how to quickly setup a small ClickHouse cluster on Hetzner Cloud using K3s Lightweight Kubernetes and Altinity.Cloud Anywhere. Hetzner Cloud is not officially supported yet, but this article will give you an introduction to how you can bring your own Kubernetes to Altinity.Cloud. Altinity.Cloud Anywhere is all about giving our customers freedom and control over their infrastructure and data while automatically managing ClickHouse not in our Kubernetes but in your Kubernetes cluster.
What do you need?
First, you need to be thrifty and be the kind of person who enjoys and values freedom and control and therefore fundamentally dislikes any kind of vendor lock-in.
thrift·y /”THriftē“/:
adjective: (of a person or their behavior) using money and other resources carefully and not wastefully.
Second, to get us started on our thrifty ClickHouse cluster, you need to have a Hetzner Cloud account, so if you don’t have one, then go to https://accounts.hetzner.com/signUp to complete this step.
Once you get your account, you are all set to get your ClickHouse running in the cloud in no time!
Hetzner Cloud
In order to run our ClickHouse cluster, we need to use a thrifty cloud provider, and Hetzner Cloud is one of them.
We will build our sample cluster using their CPX31 servers for €16.18 per month (April, 2023)

and their block storage volumes, which will cost us about €5.24 per month for 100 GB of data.

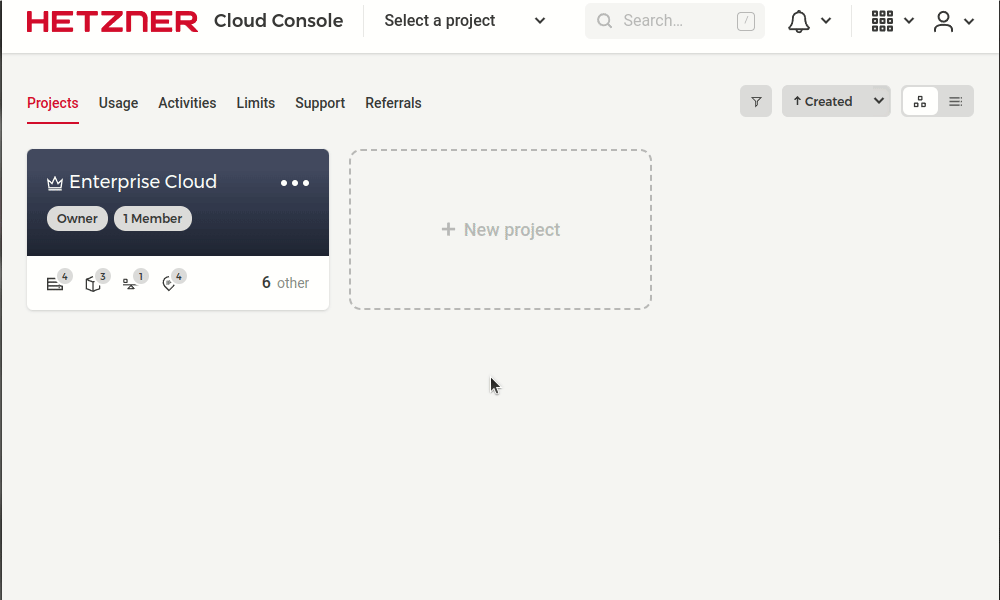
Create a new Hetzner Cloud project
Now, login to your Hetzner Cloud account and create a new project. Let’s call it My ClickHouse Cloud.
Go to Hetzner Cloud Console and click on New Project card. Then enter My ClickHouse Cloud as the project name. Finally, click the Add project button as shown below.
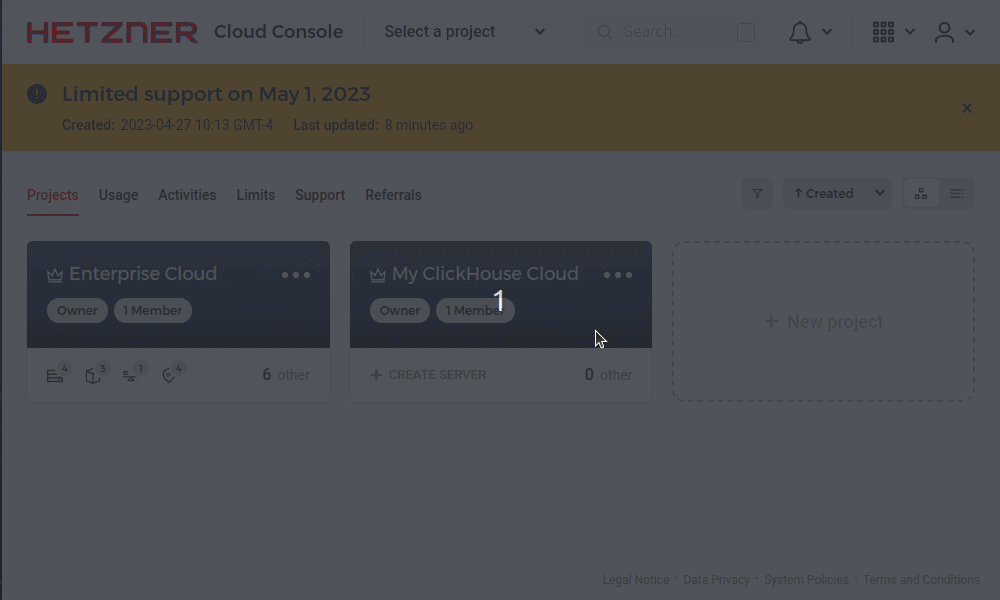
You should now have My ClickHouse Cloud project ready.
Before we can create cloud resources and set up K8s Kubernetes there, we need to create an API token.
Create API token for the project
We also need to create an API token with Read & Write permissions so that we can manage cloud resources programmatically. Again, go to your project’s Security settings and select API tokens tab. Once there, click on the Generate API token button. Add a token name, select Read & Write and click the Generate API token button to create our Read & Write token.
Once the token is generated, copy and save it. We will need to use it in the next steps.
Now, our work is done with the Hetzner Cloud Console. We are ready to create our Kubernetes cluster and run ClickHouse on it.
K3s Kubernetes cluster
Having the cloud project ready, we will set up a K3s Kubernetes cluster using the hetzner-k3s CLI utility, which will let us create and manage Kubernetes clusters in Hetzner Cloud using the lightweight K3s Kubernetes distribution from Rancher.
On Ubuntu 22.04 system we can install the latest version of the hetzner-k3s utility using the following commands:
curl -fsSLO "https://github.com/janosmiko/hetzner-k3s/releases/latest/download/hetzner-k3s_`uname -s`_`uname -m`.deb"
sudo dpkg -i "hetzner-k3s_`uname -s`_`uname -m`.deb"
Once installed, you can check the version that you got. I will be using v0.1.9.
$ hetzner-k3s -v
hetzner-k3s version v0.1.9
Kubernetes cluster
With the hetzner-k3s utility installed, we can create a Kubernetes cluster with 1 master node and 3 worker nodes for our ClickHouse cluster.
Here is the example k3s_cluster.yml config.
---
hetzner_token: <YOUR API TOKEN>
cluster_name: clickhouse-cloud
kubeconfig_path: "kubeconfig"
k3s_version: v1.26.1-rc1+k3s1
public_ssh_key_path: "/home/user/.ssh/<YOUR PUBLIC SSH KEY>.pub"
private_ssh_key_path: "/home/user/.ssh/<YOUR PRIVATE SSH KEY>"
image: "ubuntu-22.04"
verify_host_key: false
location: ash
schedule_workloads_on_masters: false
masters:
  instance_type: cpx31
  instance_count: 1
worker_node_pools:
- name: clickhouse
  instance_type: cpx31
  instance_count: 3
Add your API token for the Hetzner Cloud project and provide a path to your public and private SSH keys
that could be used to connect to the cloud servers.
After completing the Kubernetes cluster configuration file, you can create the Kubernetes cluster using the following command:
hetzner-k3s create-cluster -c k3s_cluster.yml

Once the hetzner-k3s create-cluster command complete, you should have your Kubernetes cluster ready and kubeconfig created in the current working directory where the hetzner-k3s create-cluster command was executed.
You can also go back to the Hetzner Cloud Console and see what resources have been created.
As you can see, we now have 4 servers for our 4-node Kubernetes cluster, 1 master node, and 3 worker nodes.
Each server can be accessed using SSH with specified keys.
We can now also use the kubectl utility to check that our Kubernetes cluster is up and running.
kubectl --kubeconfig kubeconfig cluster-info
Kubernetes control plane is running at https://5.161.208.74:6443
CoreDNS is running at https://5.161.208.74:6443/api/v1/namespaces/kube-system/services/kube-dns:dns/proxy

To further debug and diagnose cluster problems, use 'kubectl cluster-info dump'.
Let’s check our cluster nodes.
kubectl --kubeconfig kubeconfig get nodes
NAME                                             STATUS   ROLES                       AGE     VERSION
clickhouse-cloud-cpx31-master1                   Ready    control-plane,etcd,master   3h31m   v1.26.1-rc1+k3s1
clickhouse-cloud-cpx31-pool-clickhouse-worker1   Ready    <none>                      3h30m   v1.26.1-rc1+k3s1
clickhouse-cloud-cpx31-pool-clickhouse-worker2   Ready    <none>                      3h30m   v1.26.1-rc1+k3s1
clickhouse-cloud-cpx31-pool-clickhouse-worker3   Ready    <none>                      3h30m   v1.26.1-rc1+k3s1
As we can see, all four nodes are ready.
Altinity.Cloud Anywhere
Having our Kubernetes environment up and ready, we are ready to start using this environment in Altinity.Cloud Anywhere.
The steps that we will follow are described in Altinity.Cloud Anywhere guide.
Create a free Altinity.Cloud Anywhere trial account
Get your Free Trial Account.
Connect Kubernetes environment
Once you have a free account ready, we can connect to the Kubernetes environment. It is important to know that the environment name must be DNS-compatible. For example, we will name our environment demo-hetzner-cloud, which is valid, but Demo Hetzner Cloud would be an invalid name.
You will see connection instructions in the environment connection wizard.
First, download Altinity.Cloud connect.
curl -sSL https://github.com/altinity/altinitycloud-connect/releases/download/v0.20.0/altinitycloud-connect-0.20.0-linux-amd64 \
  -o altinitycloud-connect && chmod a+x altinitycloud-connect && sudo mv altinitycloud-connect /usr/local/bin/
Second, connect to Altinity.Cloud using the token that is provided by the Altinity Cloud Manager connection wizard.
altinitycloud-connect login --token=eyJhbGc...CSTqbk
Then simply deploy the connector to your Kubernetes cluster.
altinitycloud-connect kubernetes | kubectl --kubeconfig kubeconfig apply -f -
namespace/altinity-cloud-system created
namespace/altinity-cloud-managed-clickhouse created
clusterrole.rbac.authorization.k8s.io/altinity-cloud:node-view created
clusterrole.rbac.authorization.k8s.io/altinity-cloud:node-metrics-view created
clusterrole.rbac.authorization.k8s.io/altinity-cloud:storage-class-view created
clusterrole.rbac.authorization.k8s.io/altinity-cloud:persistent-volume-view created
clusterrole.rbac.authorization.k8s.io/altinity-cloud:cloud-connect created
serviceaccount/cloud-connect created
clusterrolebinding.rbac.authorization.k8s.io/altinity-cloud:cloud-connect created
clusterrolebinding.rbac.authorization.k8s.io/altinity-cloud:node-view created
clusterrolebinding.rbac.authorization.k8s.io/altinity-cloud:node-metrics-view created
clusterrolebinding.rbac.authorization.k8s.io/altinity-cloud:storage-class-view created
clusterrolebinding.rbac.authorization.k8s.io/altinity-cloud:persistent-volume-view created
rolebinding.rbac.authorization.k8s.io/altinity-cloud:cloud-connect created
rolebinding.rbac.authorization.k8s.io/altinity-cloud:cloud-connect created
secret/cloud-connect created
deployment.apps/cloud-connect created
Finally, inspect Kubernetes roles and resources to see that altinitycloud-connect deployed new resources to our environment.
altinitycloud-connect kubernetes
/altinitycloud-connect kubernetes
apiVersion: v1
kind: Namespace
metadata:
  name: altinity-cloud-system
---
apiVersion: v1
kind: Namespace
metadata:
  name: altinity-cloud-managed-clickhouse
---
...
Now, you can click Proceed in the connection wizard to complete the environment resource specification, where the storage class should already be prepopulated with hcloud-volumes; however, the number of AZs has to be set to 1, and we’ll set the node pool’s cpx31 instance types to be available for ClickHouse, Zookeeper, and System.
Note that the zone is not auto-detected, and in the Resources Specification JSON, we must correctly set it to the ash-dc1, as shown below.

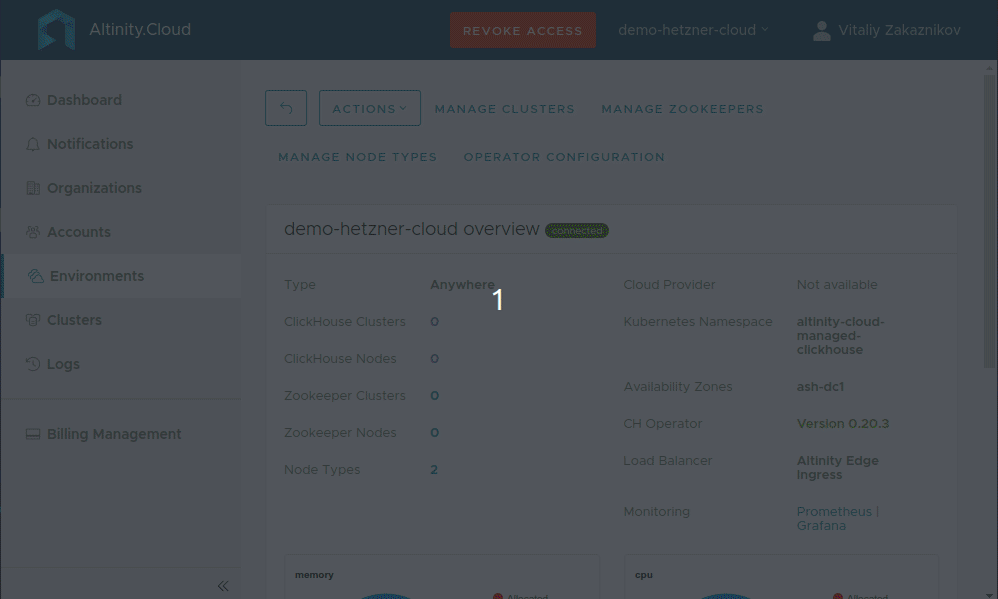
After connection to our Kubernetes environment is established, you will see our environment details, such as nodes, available memory, and CPU.
Create ClickHouse cluster
With our S3 Kubernetes environment running in Hetzner Cloud connected to Altinity.Cloud, we are ready to create our ClickHouse cluster that will be fully managed by Altinity Cloud Manager.
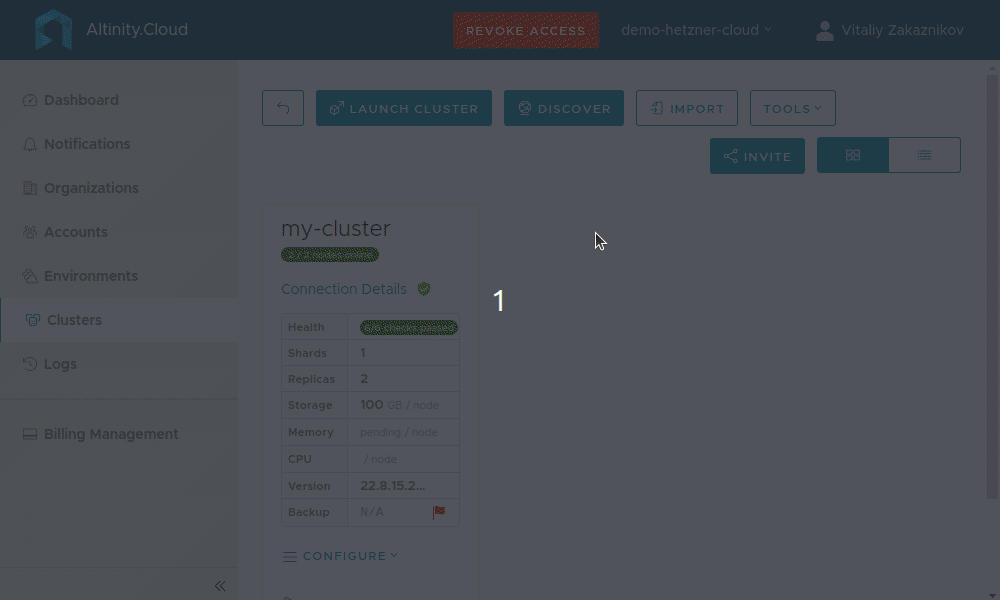
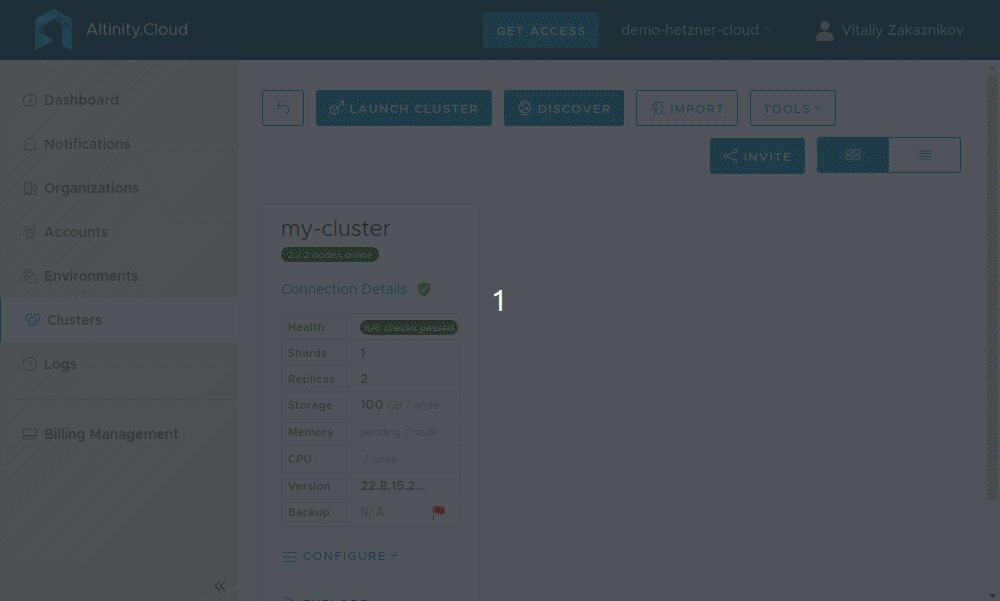
From the environment, we will click the Manage Clusters button to create our cluster.
We now need to wait for all the nodes in our cluster to become available. Once both nodes are up, we can Explore our cluster and execute queries against it.
Create replicated table
We can now create a sample replicated table.
CREATE TABLE events_local on cluster '{cluster}' (
    event_date  Date,
    event_type  Int32,
    article_id  Int32,
    title       String
) engine=ReplicatedMergeTree('/clickhouse/{installation}/{cluster}/tables/{shard}/{database}/{table}', '{replica}')
PARTITION BY toYYYYMM(event_date)
ORDER BY (event_type, article_id);
CREATE TABLE events on cluster '{cluster}' AS events_local
ENGINE = Distributed('{cluster}', default, events_local, rand());Let’s insert some dummy data.
INSERT INTO events SELECT today(), rand()%3, number, 'my title' FROM numbers(100);
Then, let’s check how the data is distributed over the cluster.
SELECT count() FROM events;
SELECT count() FROM events_local;
Conclusion
In this article, you have seen how you can use Hetzner Cloud with Altinity.Cloud Anywhere to create and manage ClickHouse. If you are a developer or a small start-up, you’ll benefit from the cost savings that are provided by Hetzner Cloud and how Altinity.Cloud Anywhere lets you turn any Kubernetes environment into a ClickHouse powerhouse. Hetzner Cloud is not yet officially supported, so configuring the load balancer for outside access has to be done manually, which was left outside the scope of this article, but we are working on making bringing your own Kubernetes environment easier. However, if the idea of bringing your own Kubernetes appeals to you, then feel free to contact us to share your vision and be among the first adopters of this exciting technology where your freedom and control over your data are not up for grabs.
ClickHouse® is a registered trademark of ClickHouse, Inc.; Altinity is not affiliated with or associated with ClickHouse, Inc.