ClickHouse Networking, Part 2

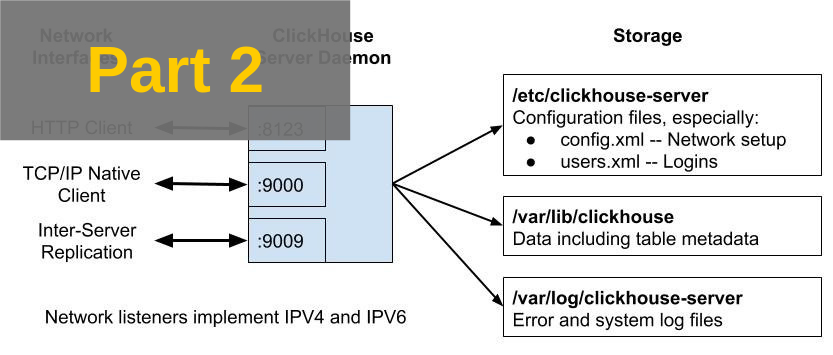
In the previous post in this series we started to dig into Clickhouse network connectivity for clients and servers. We surveyed the connectivity design and introduced listener and port configuration settings.
In this post we will describe how to enable encrypted connections, discuss some common networking problems, and list sources for further reading.
Enabling Encryption
ClickHouse has good support for encryption on listener ports. There are three steps to enable it.
-
Turn on encryption by enabling the corresponding XML port tags, for example, tcp_port_secure.
-
Set up a certificate and optionally Diffie-Hellmann parameters for perfect forward encryption on the server side. There are multiple options for certificates as well as many specialized settings related to encryption in general.
-
Ensure clients can connect.
Turn on Encryption for Specific Ports
Enable encrypted communications by uncommenting the appropriate XML tags in config.xml. Here’s an example of settings to enable HTTPS on the HTTP query port and TLS encryption on native TCP/IP connections, listening on all available IPV4 network interfaces. Note that the unencrypted ports are commented out, which turns off their listeners.
<yandex>
    ...
    <https_port>8443</https_port>
    <tcp_port_secure>9440</tcp_port_secure>
    <!--
    <http_port>8123</http_port>
    <tcp_port>9000</tcp_port>
    <interserver_http_port>9009</interserver_http_port>
    -->
    <listen_host>0.0.0.0</listen_host>
    ...
</yandex>
Configure Encryption Settings
Whenever encryption is enabled ClickHouse will try to load an X509 certificate and private key based on values in the openSSL and server tags. It will also seek Diffie-Hellman key exchange parameters. Here’s the default configuration from a newly installed server.
<yandex>
  <openSSL>
    <server>
      <!-- Used for https server AND secure tcp port -->
      <certificateFile>/etc/clickhouse-server/server.crt</certificateFile
      <privateKeyFile>/etc/clickhouse-server/server.key</privateKeyFile>
      <dhParamsFile>/etc/clickhouse-server/dhparam.pem</dhParamsFile>
      <verificationMode>none</verificationMode>
      <loadDefaultCAFile>true</loadDefaultCAFile>
      <cacheSessions>true</cacheSessions>
      <disableProtocols>sslv2,sslv3</disableProtocols>
      <preferServerCiphers>true</preferServerCiphers>
    </server>
    ...
  </openSSL>
</yandex>
As these settings show, you need to supply the following files.
-
Server X509 Certificate and private key (conventionally server.crt and server.key)
-
Diffie-Hellman parameters (conventionally dhparam.pem)
You can rename files by changing the tag values. You can also change other parameters related to encryption as we’ll discuss shortly.
Server Certificate and Private Key
Servers that use encryption must have a valid X509 certificate and private key. There are several methods to do this. They vary in the level of effort on the server side and have varying impacts on clients. We’ll take three of these as examples.
Method 1: Use a Certificate signed by a recognized Certificate Authority (CA)
When using this method, you’ll need to have a certificate generated by a well-known authority like Let’s Encrypt or Verisign. The steps differ somewhat for each authority but basically boil down to the following:
-
Generate a key pair using openssl.
-
Generate a certificate signing request (CSR) using openssl and send it to the CA for signing. This process (and also certificate renewal) can be automated by tools like https://certbot.eff.org
-
Supply proofs of identity required by CA, who signs the certificate and returns it to you.
-
Distribute the server private key and signed certificate to the ClickHouse server as ‘server.key’ and ‘server.crt’ respectively. (Or rename them and change config.xml accordingly.)
Using a certificate from a recognized CA can be cumbersome for internal servers and potentially expensive. That said, this method has the advantage that client applications will simply accept the certificate, as it is signed by a trusted authority already known to application libraries.
Method 2: Create your own CA and sign your own Certificate.
In this method we’ll create our own certificate authority (CA) with a root certificate and use it to sign certificates ourselves. It’s a good approach for internal systems, though we’ll need an extra step to ensure clients accept certificates from our internal CA.
Here’s an exact set of steps to create and use an internal CA on Ubuntu 16.04 and above. Other distributions may vary slightly. (Thanks to Kyle Drake for a nice example of this procedure.)
Let’s first create a self-signed root certificate for our Certificate Authority. Important note: Make sure the common name (CN) is something like ‘root’ that won’t be confused with an actual host name.
mkdir CA
cd CA
openssl genrsa -aes256 -out my-own-ca.key 2048
openssl req -new -x509 -days 3650 -key my-own-ca.key \
  -sha256 -extensions v3_ca -out my-own-ca.crt
Keep the resulting files in a safe place so that you don’t lose them and unauthorized people cannot access the CA secret key. Now, each time you need a certificate you can generate one using steps like the example below.
# Generate server.key and server.crt signed by our local CA.
openssl genrsa -out server.key 2048
openssl req -sha256 -new -key server.key -out server.csr
openssl x509 -sha256 -req -in server.csr -CA my-own-ca.crt \
  -CAkey my-own-ca.key -CAcreateserial -out server.crt -days 365
# Confirm the certificate is valid.
openssl verify -CAfile my-own-ca.crt server.crt
Distribute the server.key and server.crt file to the ClickHouse server by putting them in the /etc/clickhouse-server directory.
The last step is to tell clients about the new CA so that they will recognize that X509 certificates it has signed are valid. Your CA is private and applications won’t accept its signature until you add it to the list of trusted CAs. Here are the steps for Ubuntu 16.04 and above. Again, these steps may vary slightly on other Linux distributions.
sudo cp my-own-ca.crt /usr/local/share/ca-certificates/root.ca.crt
sudo update-ca-certificates
This will allow clients based on openssl to validate your generated certificates. To ensure you got it right, check that clickhouse-client can connect, as in the following example:
clickhouse-client --secure --host=logos2Not all clients necessarily validate certificates the same way. For example Java applications use the keytool utility to add new CA certificates to a truststore file that the JVM loads at runtime. Some applications may even need code changes to introduce a new root certificate. You’ll need to consult appropriate documentation for your client and/or programming language.
Method 3: Use a self-signed certificate
In the final method we skip the CA and just generate a self-signed certificate, which means that the X509 cert is signed using its own private key. This method is only recommended for testing situations as it undoes the main protections that certificates offer to encrypted communications.
Let’s start by generating a self-signed certificate. You can also find these instructions in the config.xml in the server tag. Execute the following command:
sudo openssl req -subj "/CN=my.host.name" -new \
-newkey rsa:2048 -days 365 -nodes -x509 \
-keyout /etc/clickhouse-server/server.key \
-out /etc/clickhouse-server/server.crt
If you use this certificate most clients will now fail when they connect to the ClickHouse server with a message like the following:
clickhouse-client --secure --host=127.0.0.1
ClickHouse client version 19.4.0.49.
Connecting to 127.0.0.1:9440 as user default.
Code: 210. DB::NetException: SSL Exception: error:14007086:SSL
routines:CONNECT_CR_CERT:certificate verify failed (127.0.0.1:9440)
To get around this you must turn off certificate validation on the client side. For clickhouse-client, you can do this by editing /etc/clickhouse-client/config.xml and allowing invalid certificates. Here’s an example:
<config>
  <openSSL>
    <client> <!-- Used for connection to server's secure tcp port ?
      ...
      <invalidCertificateHandler>
        <name>AcceptCertificateHandler</name>
      </invalidCertificateHandler>
    </client>
  </openSSL>
This change also applies to the ClickHouse server itself when using distributed tables that send queries to encrypted server ports. In this case you’ll need to edit the same <openSSL><client> tags in /etc/clickhouse-server/config.xml. You can check your work by issuing queries through a distributed table that accesses multiple shards.
NOTE: The same configuration change is necessary when using the url() table function on HTTPS servers with self-signed servers. The <openSSL><client> tag applies for any client connection, not just distributed tables. This widens the potential effect of security problems, as noted below.
Turning off validation is specific to particular clients and programming languages. For example, the Python clickhouse-driver has the verify option to turn off validation like the following example:
client = Client('ch01.yoyodyne.com',
                secure=True,
                verify=False)
Check language documentation for your particular client type to discover the correct option(s) to use.
Finally, please note that turning off certificate validation to accommodate self-signed certificates for any reason turns off all validation, hence exposes ClickHouse applications to man-in-the-middle attacks. Attackers can hijack secure connections by inserting a proxy server equipped with an invalid certificate. For this reason we definite do not recommend self-signed certificates in production deployments.
Diffie-Hellman Parameters
Diffie-Hellman parameters supply values used to generate keys. They are only used by the ClickHouse server, which distributes them automatically to clients. You may omit this file by commenting out the tag, but doing so is not recommended as it potentially weakens encryption for protocols built on Diffie-Hellman key exchange.
Generate dhparam.pem using the following command (execute as root). Note that this can be a *very* slow operation but does not need to be repeated.
cd /etc/clickhouse-server
openssl dhparam -out /etc/clickhouse-server/dhparam.pem 4096
Other Encryption Parameters
ClickHouse supports a wide range of additional parameters for encryption, including the ability to prefer or reject specific ciphers, force use of TLS, and other settings that InfoSec teams value highly. Check the ClickHouse docs on the openSSL tag for more information.
Common Connectivity Problems
Connectivity can fail in a variety of ways, often resulting in mysterious symptoms. Here are some of the more common problems and solutions.
Server Restart Failures
ClickHouse fails on restart following many types of configuration errors, such as missing file names or invalid port values. The ClickHouse logs in /var/log/clickhouse-server are a good first resource, especially if your server does not start after a configuration change. Check for obvious errors, correct, and restart.
Port Overlaps
Port overlaps are a source of restart failures. You will see an error like the following in the ClickHouse error log:
Net Exception: Address already in use: 127.0.0.1:9000There are two common reasons for such errors.
-
Another application is using the port. For example PHP-fpm also uses port 9000 by default. You can check for services squatting on ClickHouse ports by executing either sudo lsof -i :9000 or sudo netstat -ltnp | grep ‘:9000’. (Your port may vary of course.)
-
The port is listed twice in config.xml. This might not be obvious at first glance and you may need to look carefully at the listen_host tags. For example, the following listener configuration would result in a port overlap.
<listen_host>0.0.0.0</listen_host>
<listen_host>127.0.0.1</listen_host>
Certificate Validation Errors
Certificate validation problems are a common source of failures on secure connections.
You can verify that the server is correctly delivering valid certificates using openssl. The following example shows how to prove that server logos2 delivers a valid X509 certificate to connections on port 9440. Any return code other than 0 is a problem.
openssl s_client -connect logos2:9440 < /dev/null
CONNECTED(00000003)
depth=1 C = US, ST = CA, L = Berkeley, O = Altinity, OU = Eng, CN = root, emailAddress = info@altinity.com
verify return:1
depth=0 C = US, ST = CA, L = Berkeley, O = Altinity, OU = Eng, CN = logos2, emailAddress = info@altinity.com
verify return:1
. . .
    Start Time: 1552341048
    Timeout   : 300 (sec)
    Verify return code: 0 (ok)
---
DONE
Beyond this you may have to step into specific application logs to get further information about failures. Java applications have a rich set of options to log SSL behavior, most notably the -Djavax.net.debug=all flag. This is very helpful for cases where application library behavior differs from off-the-shelf programs like clickhouse-client.
DNS-Related Problems
ClickHouse caches DNS names used for connections between servers. This can lead to problems if a host changes its IP address dynamically, or if you change DNS records to switch traffic to another server. In this case you may see errors like the following:
Timeout: connect timed outor
Host not found: hostnameOr you may notice that ClickHouse still accesses an old server after the DNS change.
The simplest way to clean the DNS cache without restarting ClickHouse is to send the following command:
SYSTEM DROP DNS CACHEIf DNS name changes are a common occurrence you may want to disable the internal DNS cache entirely by using disable_internal_dns_cache setting. Doing so may decrease ClickHouse network performance, hence is not recommended for normal situations. Users have also reported bugs in this feature, which is another reason to use it cautiously.
Other Connectivity Errors
Additional connectivity problems may arise due to sharding and replication. We plan to address such errors in future articles related to these topics.
Further Reading
The ClickHouse documentation is a good place to look as well as source code files. For deeper insight the following source files are especially helpful.
-
Server.cpp — Nicely commented C++ logic for configuring ports at ClickHouse server start. Very readable even for non-C++ programmers.
-
SSLManager.h — Implementation of interface to encryption services in ClickHouse. Commented copiously.
Conclusion
ClickHouse offers flexible network connectivity and is relatively easy to configure. This article and the preceding offered a basic introduction. We hope you find it useful and welcome comments or corrections. Please send your feedback to info at altinity.com.
We plan to write future articles that cover related topics like replication configuration, user authentication and authorization, as well as best practices for deploying secure ClickHouse servers on a variety of platforms. Additional articles will be coming out shortly, so stay tuned!
Thanks for the great tutorial!
I wonder if anyone has tried to setup a clickhouse server cluster using secure connections:For example, clickhouse-server/config.xml<remote_servers incl="clickhouse_remote_servers" > <my_remote_shard> <shard> <replica> <host>my-server2</host> <port>9440</port> </replica> </shard> <shard> <replica> <host>my-server1</host> <port>9440</port> </replica> </shard> </my_remote_shard> </remote_servers incl="clickhouse_remote_servers" >
Best Regards.
Hi!TLS encryption should work fine. Here are three ways it can work.
1.) If you have real certificates from a CA (such as LetsEncrypt) just use the ports as you show. It should work.
2.) If you are using your own certificate authority, just make sure each server host or container has the signing certificate registered as a trusted cert. It’s a variation on what I described in the tutorial.
3.) Finally, another option is to run ClickHouse on its own subnet and use 9000 within the cluster but only route 9440/TLS in from the outside. You can do this with firewall rules, for example. Just make sure you don’t accidentally allow connections to 9000.
Good luck and glad you found the tutorial useful!
BR, Robert